
Vapor Barriers
Overview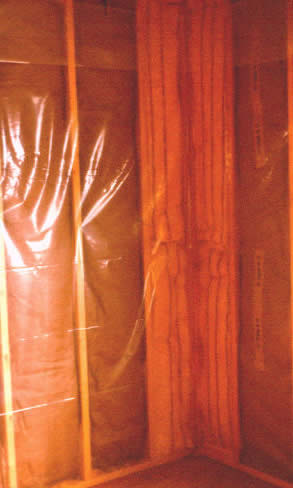
The details around the use of a vapor barrier (also called a vapor retarder) are HIGHLY controversial. There have been many law suites and fortunes lost over the improper use and/or installation of vapor barriers.
When vapor barriers are correctly applied and installed, they result in substantial energy savings and increased building life. When they are improperly used, they can lead to shortened building life and air quality problems.
Vapor barriers can be used to both keep moisture out of the house and to keep moisture in the house. At different times of the year and under different climate conditions, which one we want to do changes. However, once installed the vapor barrier cannot be moved. Thus, the problem.
Where to Install
It is generally agreed that vapor barriers should be installed on the winter-warm side of insulation. For Southern US locations there are other rules; see Vapor Retarders More. The remainder of this discussion will be from the ‘winter-warm’ perspective.
The Problem
Moisture, in the form of vapor in the air, moves from the inside of the house towards the outside. This is caused by at least two factors:
- Heat always seeks cold, so heat moves towards cold taking moisture with it
- Moisture seeks dry, and during the winter time, outdoor air is dryer than indoor
Moisture collects at the dew point, which is someplace in the middle of the insulation as the temperature drops from the warm side to the cold side. A vapor barrier on the warm side is supposed to stop the moisture from getting into the insulation/wall cavity/attic, etc.
Complications arise when:
- the vapor barrier is not ‘perfect’ because of rips and penetrations at the time of installation and because of opening for electrical outlets, windows, doors, plumbing, etc.
- infiltration carries water vapor around the barrier
Old Houses
Old houses were built without vapor barriers; they were also built without insulation. Drafty old, un-insulated houses did not suffer much from moisture problems because the dry winter air blew through the house and kept everything relatively dry. As insulation gets added to the house, cracks are sealed up and drafty windows replaced, things start to change.
Indicators of moisture problems in old houses include:
- paint that peels off wood siding
- frost on the underside of roof sheathing
- water running out from under baseboards or into the basement on exterior walls
- problems with wall paper and other interior finishes
- mold
- excess condensation on windows
Measures
- Vapor Barrier Paint
Unless an old house is renovated down to the framing, it is impossible to install a vapor barrier as a retrofit. About the only thing that can be done for walls and ceiling is to use a vapor barrier paint. There are a variety of products available for this purpose that provide a reasonable amount of protection. They should only be used where there are obvious signs of problems.
Often old houses have several layers of paint, including paints that may contain lead. These multiple layers of paint may already function like a vapor barrier.
- Seal air leaks into exterior walls
- Reduce Vapor Sources
New Houses
New houses should have continuous vapor barriers installed on the walls and ceilings. Kraft facing on fiberglass insulation is not an effective vapor barrier, especially when it is stapled on the inside of studs; it is almost never installed correctly to provide an adequate barrier. The the use of a 6 mil minimum poly sheet (photo above) installed over the framing and insulation, just under the drywall, is the most effective when properly installed.
Some latitude can be given when it comes to ceilings, because attics can be ventilated. If however it is a cathedral or poorly ventilated area, then it too must have a continuous vapor barrier.
Drywall contractors may not like the use of poly vapor barriers as it eliminates their ability to use glue to attach the drywall. They must use more screws which increases their labor time.
Vapor Barrier paints have been used effectively when 6 mil poly was not acceptable to the builder or sub-contractors.
Measures
- Install continuous vapor barriers
- on walls
- on ceilings
- crawl space floors
- Seal air leaks into exterior walls
- Reduce vapor sources if there is a known problem
Reduce the Vapor Source
It is also important to reduce the sources of water vapor, if the house is experiencing signs of problems. Many houses are so dry during the winter they must run humidifiers. To reduce sources of water vapor:
- cover bare ground in crawl spaces with a vapor barrier
- cover the inside walls of damp basements with a vapor barrier
- take corrective action to repair wet basements
- cook with lids on pots
- run bath fans during showering
- be sure to vent the dryer to the OUTSIDE
- reduce house plants (house plant watering)
- use lids/covers on spa and other water sources that are indoors or connected to indoor spaces
Indoor Air Quality
For information about how vapor barriers affect air quality, see these topics:
More Information
For more detailed and complex discussion on vapor barriers and retarders see Vapor Retarders More
See a Paper and discussion from The Building Science Corporation about the use of vapor barriers in basement wall insulation.
Source: Text Bob Fegan 9/2003; vapor barrier photo Bob Fegan; rev 5/2008;
© 2008 Energy Solutions Center400 N. Capitol Street NWWashington, DC 20001 All rights reserved. Legal Contact our webmaster